Contributing
Setup Dev Environment
We currently officially support the below methods to set up your development environment for Formbricks.
Both the below cloud IDEs have a generous free tier to explore and develop! But make sure to not overuse the machines as Formbricks will not be responsible for any charges incurred.
GitPod
This will open a fully configured workspace in your browser with all the necessary dependencies already installed. Click the button below to open this project in Gitpod. For a detailed guide, visit the Gitpod Setup Guide section below.

Github Codespaces
This will open a Github VSCode Interface on the cloud for you. This setup will have the Formbricks codebase and all the dependencies installed. Click the button below to configure your instance and open the project in Github Codespaces. For a detailed guide, visit the Github Codespaces Setup Guide section below.
Local Machine
This will install the Formbricks codebase and all the dependencies on your local machine. Note that this method is recommended only for advanced users. If you're an advanced user, access the steps for Local Machine Setup here.
For a smooth experience, we suggest the above cloud IDE methods. Assistance with setup issues on your local machine may be limited due to varying factors like OS and permissions.
Gitpod Guide
Building custom image for the workspace:
- This includes : Installing
yqandturboglobally before the workspace starts. This is accomplished within the.gitpod.Dockerfilealong with starting upon a base custom image building on workspace-full.
Initialization of Formbricks:
- During the prebuilds phase, we initialize Formbricks by performing the following tasks:
- Setting up environment variables.
- Installing monorepo dependencies.
- Installing Docker images by extracting them from the
packages/database/docker-compose.ymlfile. - Building the @formbricks/js component.
- When the workspace starts:
- Wait for the web and demo apps to launch on Gitpod. This automatically opens the
apps/demo/.envfile. Utilize dynamic localhost URLs (e.g.,localhost:3000for signup andlocalhost:8025for email confirmation) to configureNEXT_PUBLIC_FORMBRICKS_ENVIRONMENT_ID. After creating your account and finding theIDin the URL atlocalhost:3000, replaceYOUR_ENVIRONMENT_IDin the.envfile located inapp/demo.
- Wait for the web and demo apps to launch on Gitpod. This automatically opens the
Web Component Initialization:
- we initialize the @formbricks/web component during prebuilds. This involves:
- Installing build dependencies for the
@formbricks/web#gotask from turbo.json in prebuilds to save time. - Starting PostgreSQL and Mailhog containers for running migrations in prebuilds.
- To prevent the "Init" task from running indefinitely due to prebuild rules, a cleanup
docker compose downstep i.e.db:downis added toturbo.json. This step is designed to halt the execution of containers that are currently running.
- Installing build dependencies for the
- When the workspace starts:
- Initializing environment variables.
- Replacing
NEXT_PUBLIC_WEBAPP_URLandNEXTAUTH_URLto take in Gitpod URL's ports when running on VSCode browser. - Starting the
@formbricks/webdev environment.
Demo Component Initialization:
- Similar to the web component, the demo component is also initialized during prebuilds. This includes:
- Installing build dependencies for the
formbricks/demo#gotask from turbo.json in prebuilds to save time. - Caching hits and replaying builds from the
@formbricks/jscomponent.
- Installing build dependencies for the
- When the workspace starts:
- Initializing environment variables.
- Replaces
NEXT_PUBLIC_FORMBRICKS_API_HOSTto take in Gitpod URL's ports when running on VSCode browser. - Starting the
@formbricks/demodev environment.
Github Prebuilds Configuration:
- This configures Github Prebuilds for the master branch, pull requests, and adding comments. This helps automate the prebuild process for the specified branches and actions.
VSCode Extensions:
- This includes a list of VSCode extensions that are added to the configuration when using Gitpod. These extensions can enhance the development experience within Gitpod.
1. Browser Redirection
After clicking the one-click setup button, Gitpod will open a new tab or window. Please ensure that your browser allows redirection to successfully access the services:
2. Authorizing in Gitpod
 -
This is the Gitpod Authentication Page. It appears when you click the "Open in GitPod" button and Gitpod needs
to authenticate your access to the workspace. Click on 'Continue With Github' to authorize your GitPod session.
-
This is the Gitpod Authentication Page. It appears when you click the "Open in GitPod" button and Gitpod needs
to authenticate your access to the workspace. Click on 'Continue With Github' to authorize your GitPod session.
3. Creating a New Workspace
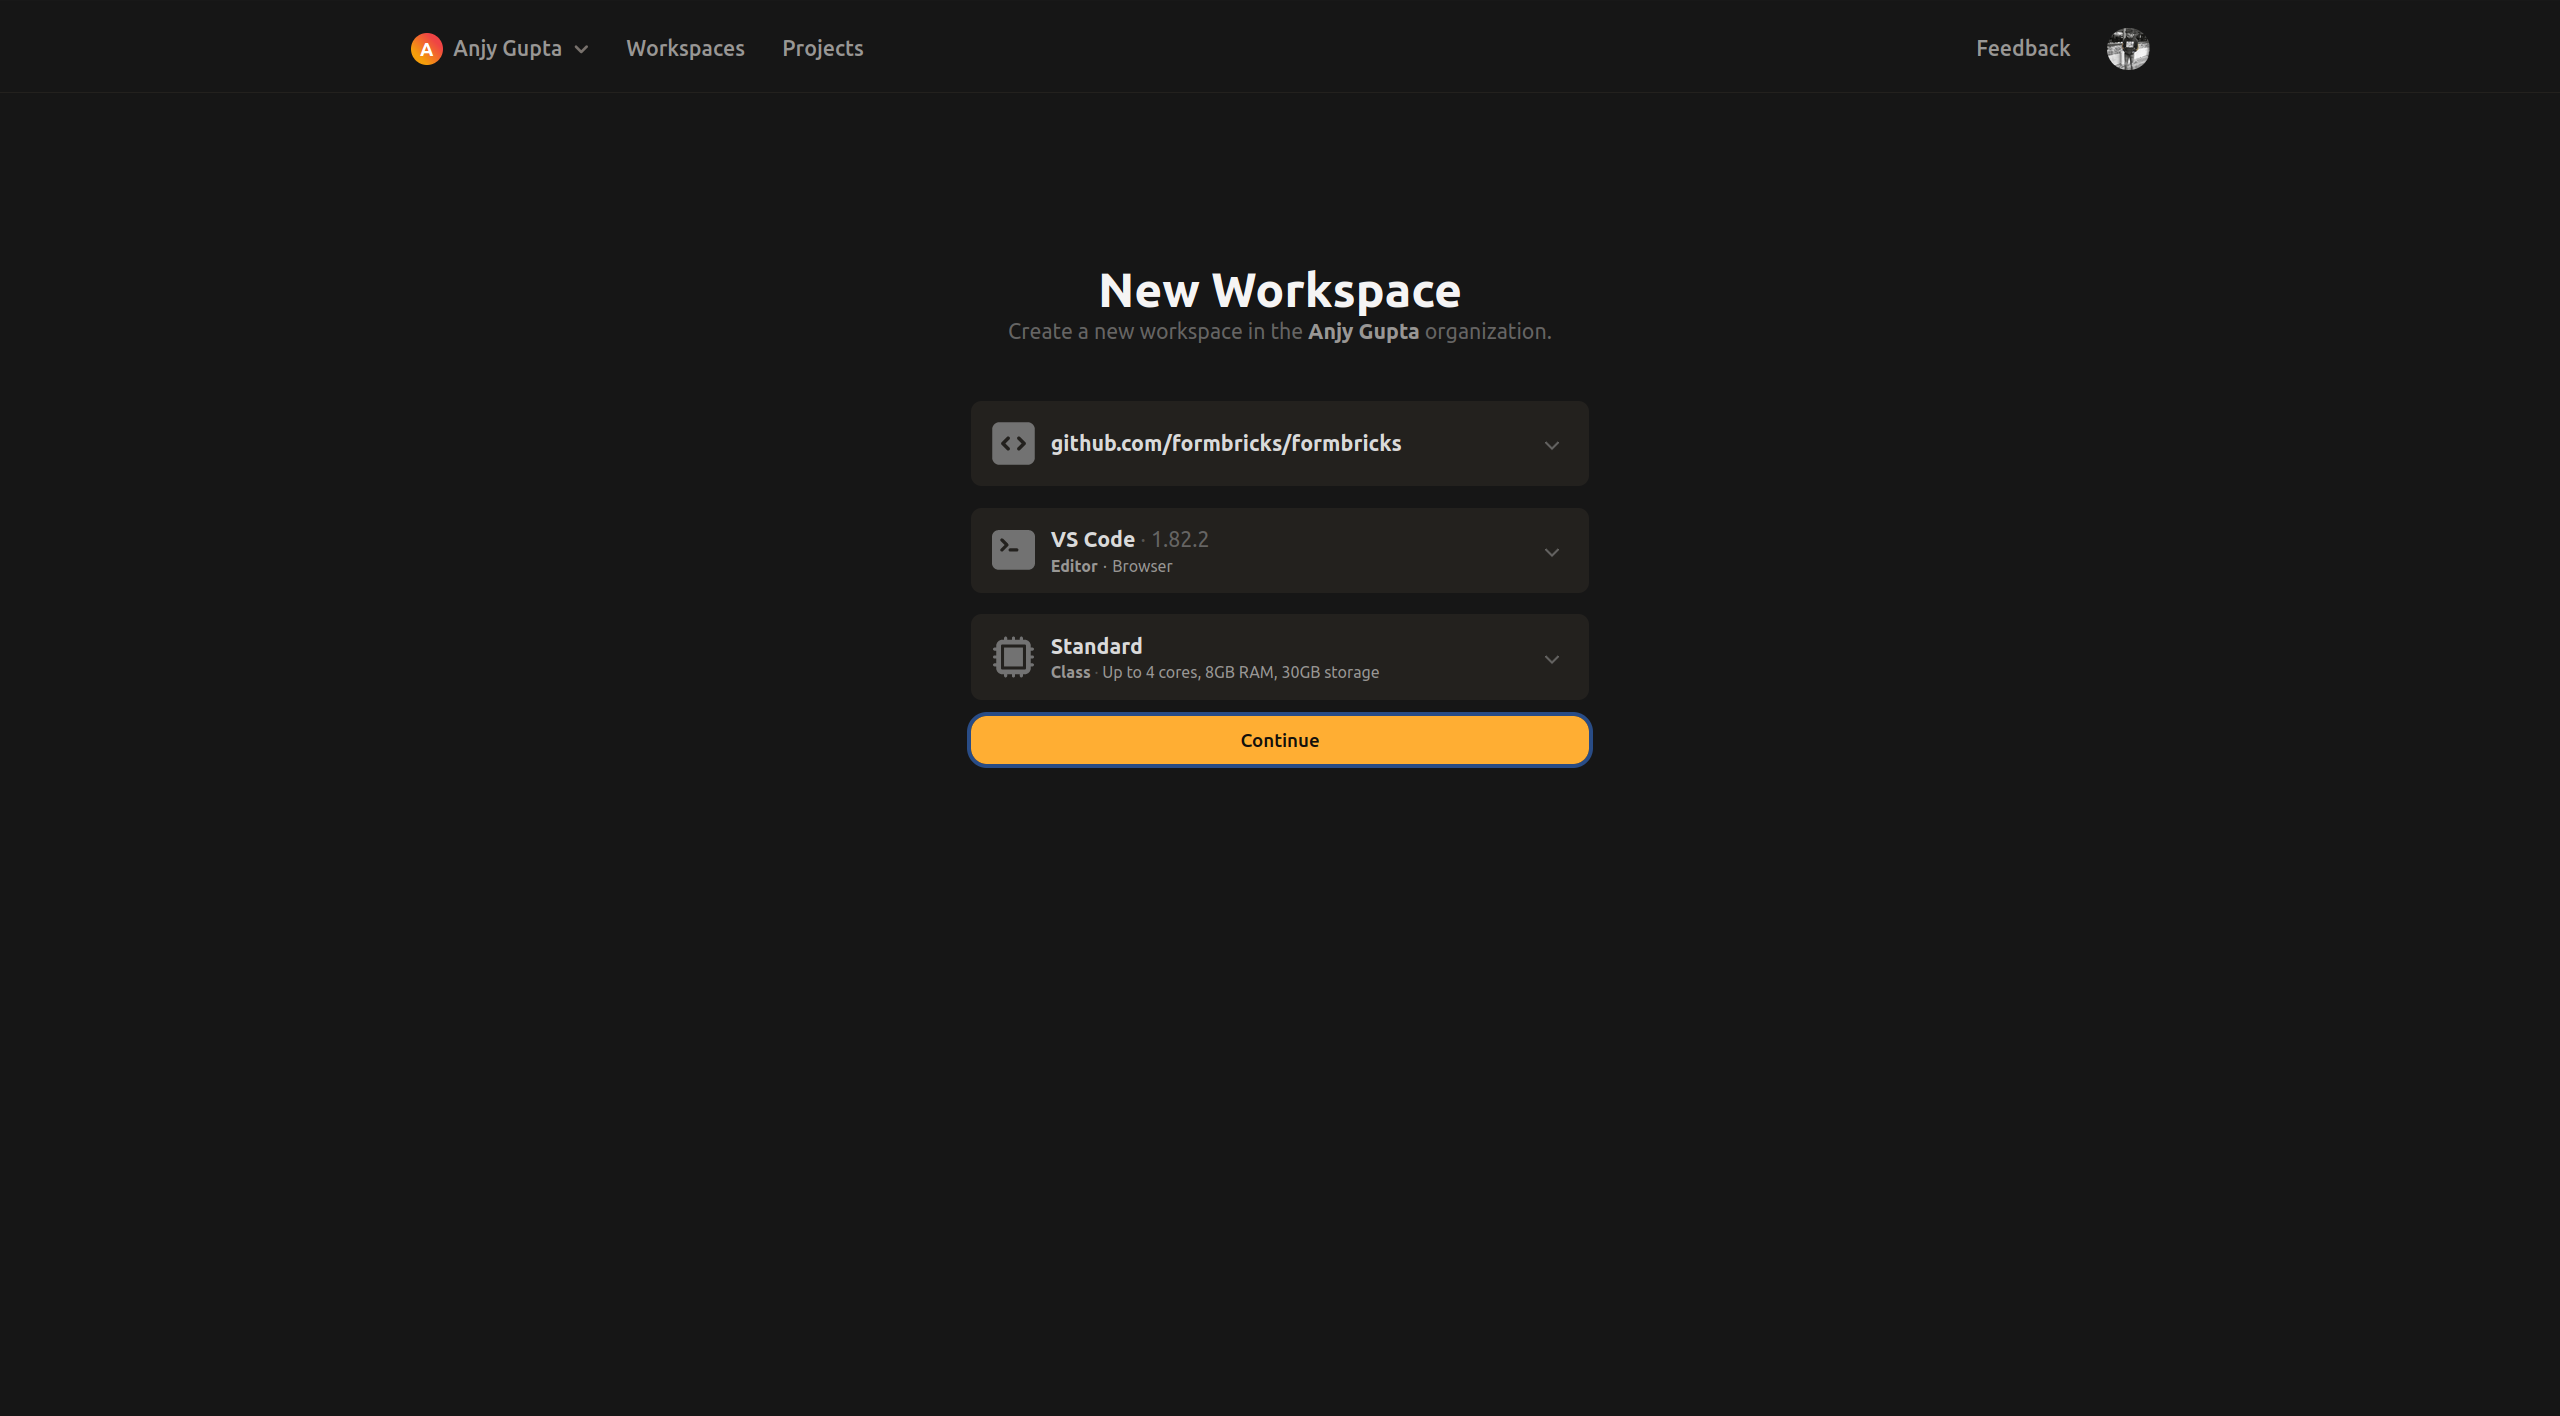
- After authentication, Gitpod asks to create a new workspace for you. This page displays the configurations of
your workspace. - You can use either choose either VS Code Browser or VS Code Desktop editor with the 'Standard
Class' for your workspace class. - If you opt for the VS Code Desktop, follow the following steps 1. Gitpod will
prompt you to grant access to the VSCode app. Once approved, install the GitPod extension from the VSCode Marketplace
and follow the prompts to authorize the integration. 2. Change the
WEBAPP_URLand theNEXTAUTH_URLtohttps://localhost:3000
4. Gitpod preparing the created Workspace
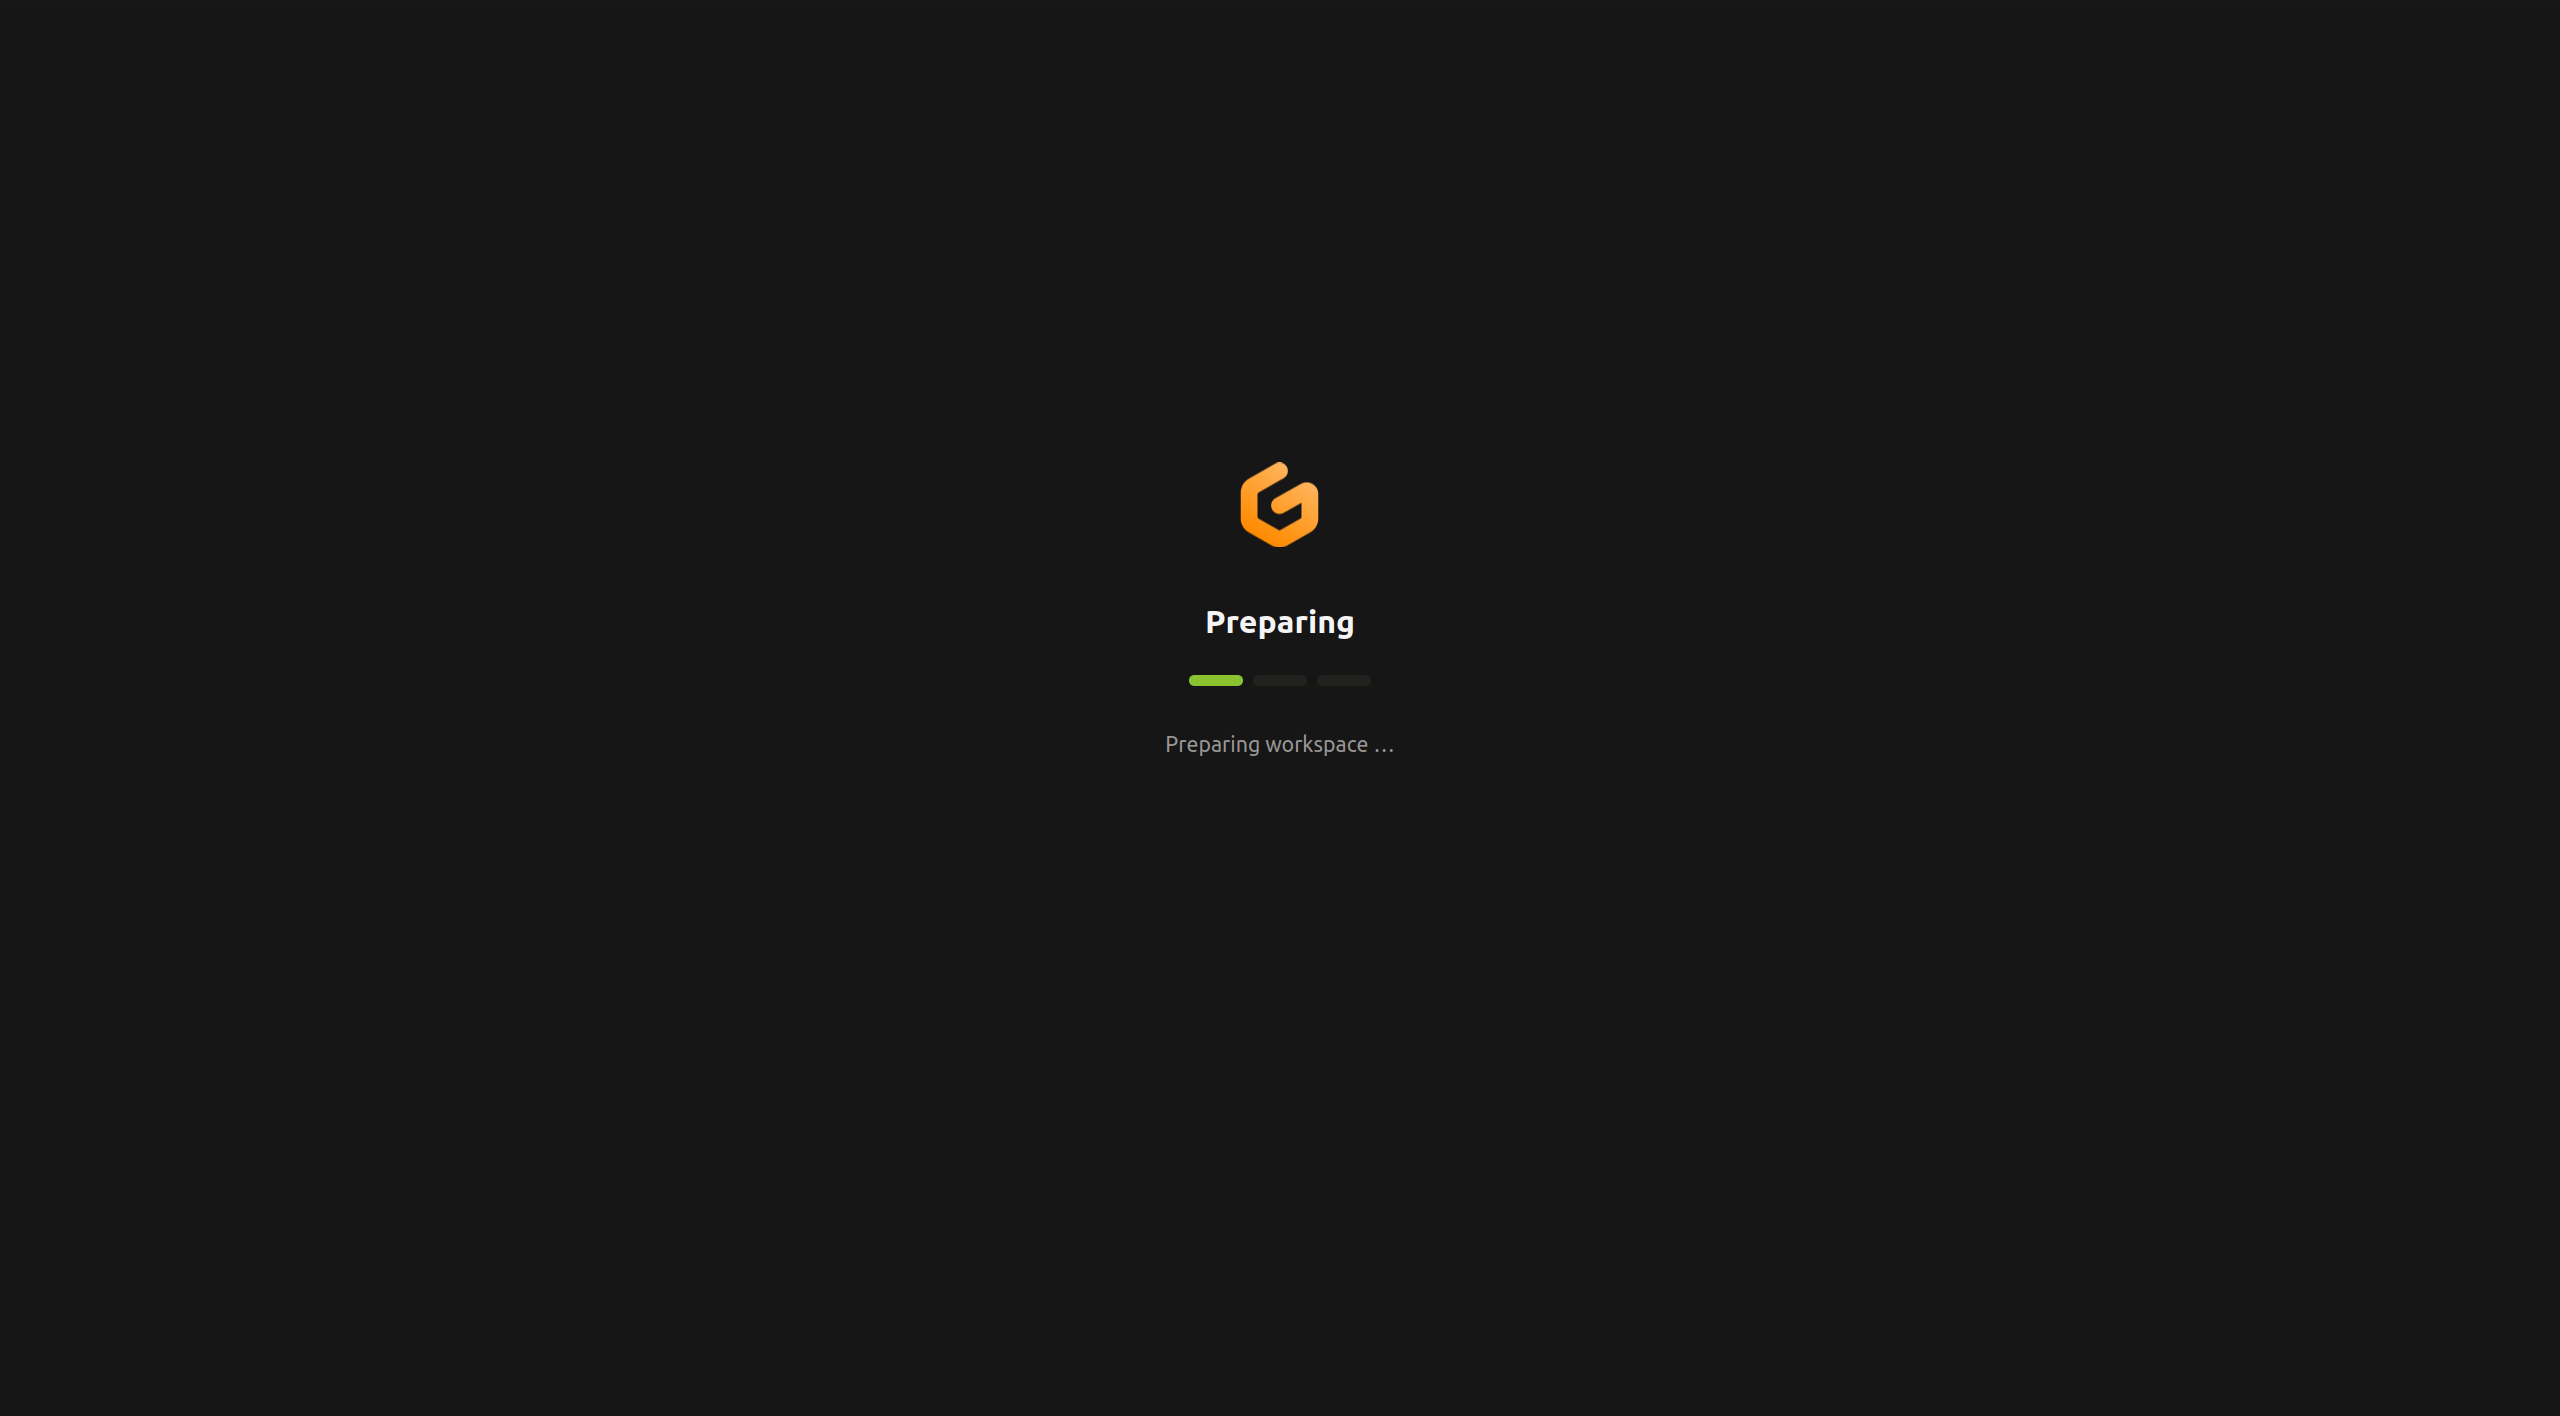
- Gitpod is preparing your workspace with all the necessary dependencies and configurations. You will see this page while Gitpod sets up your development environment.
5. Gitpod running the Workspace
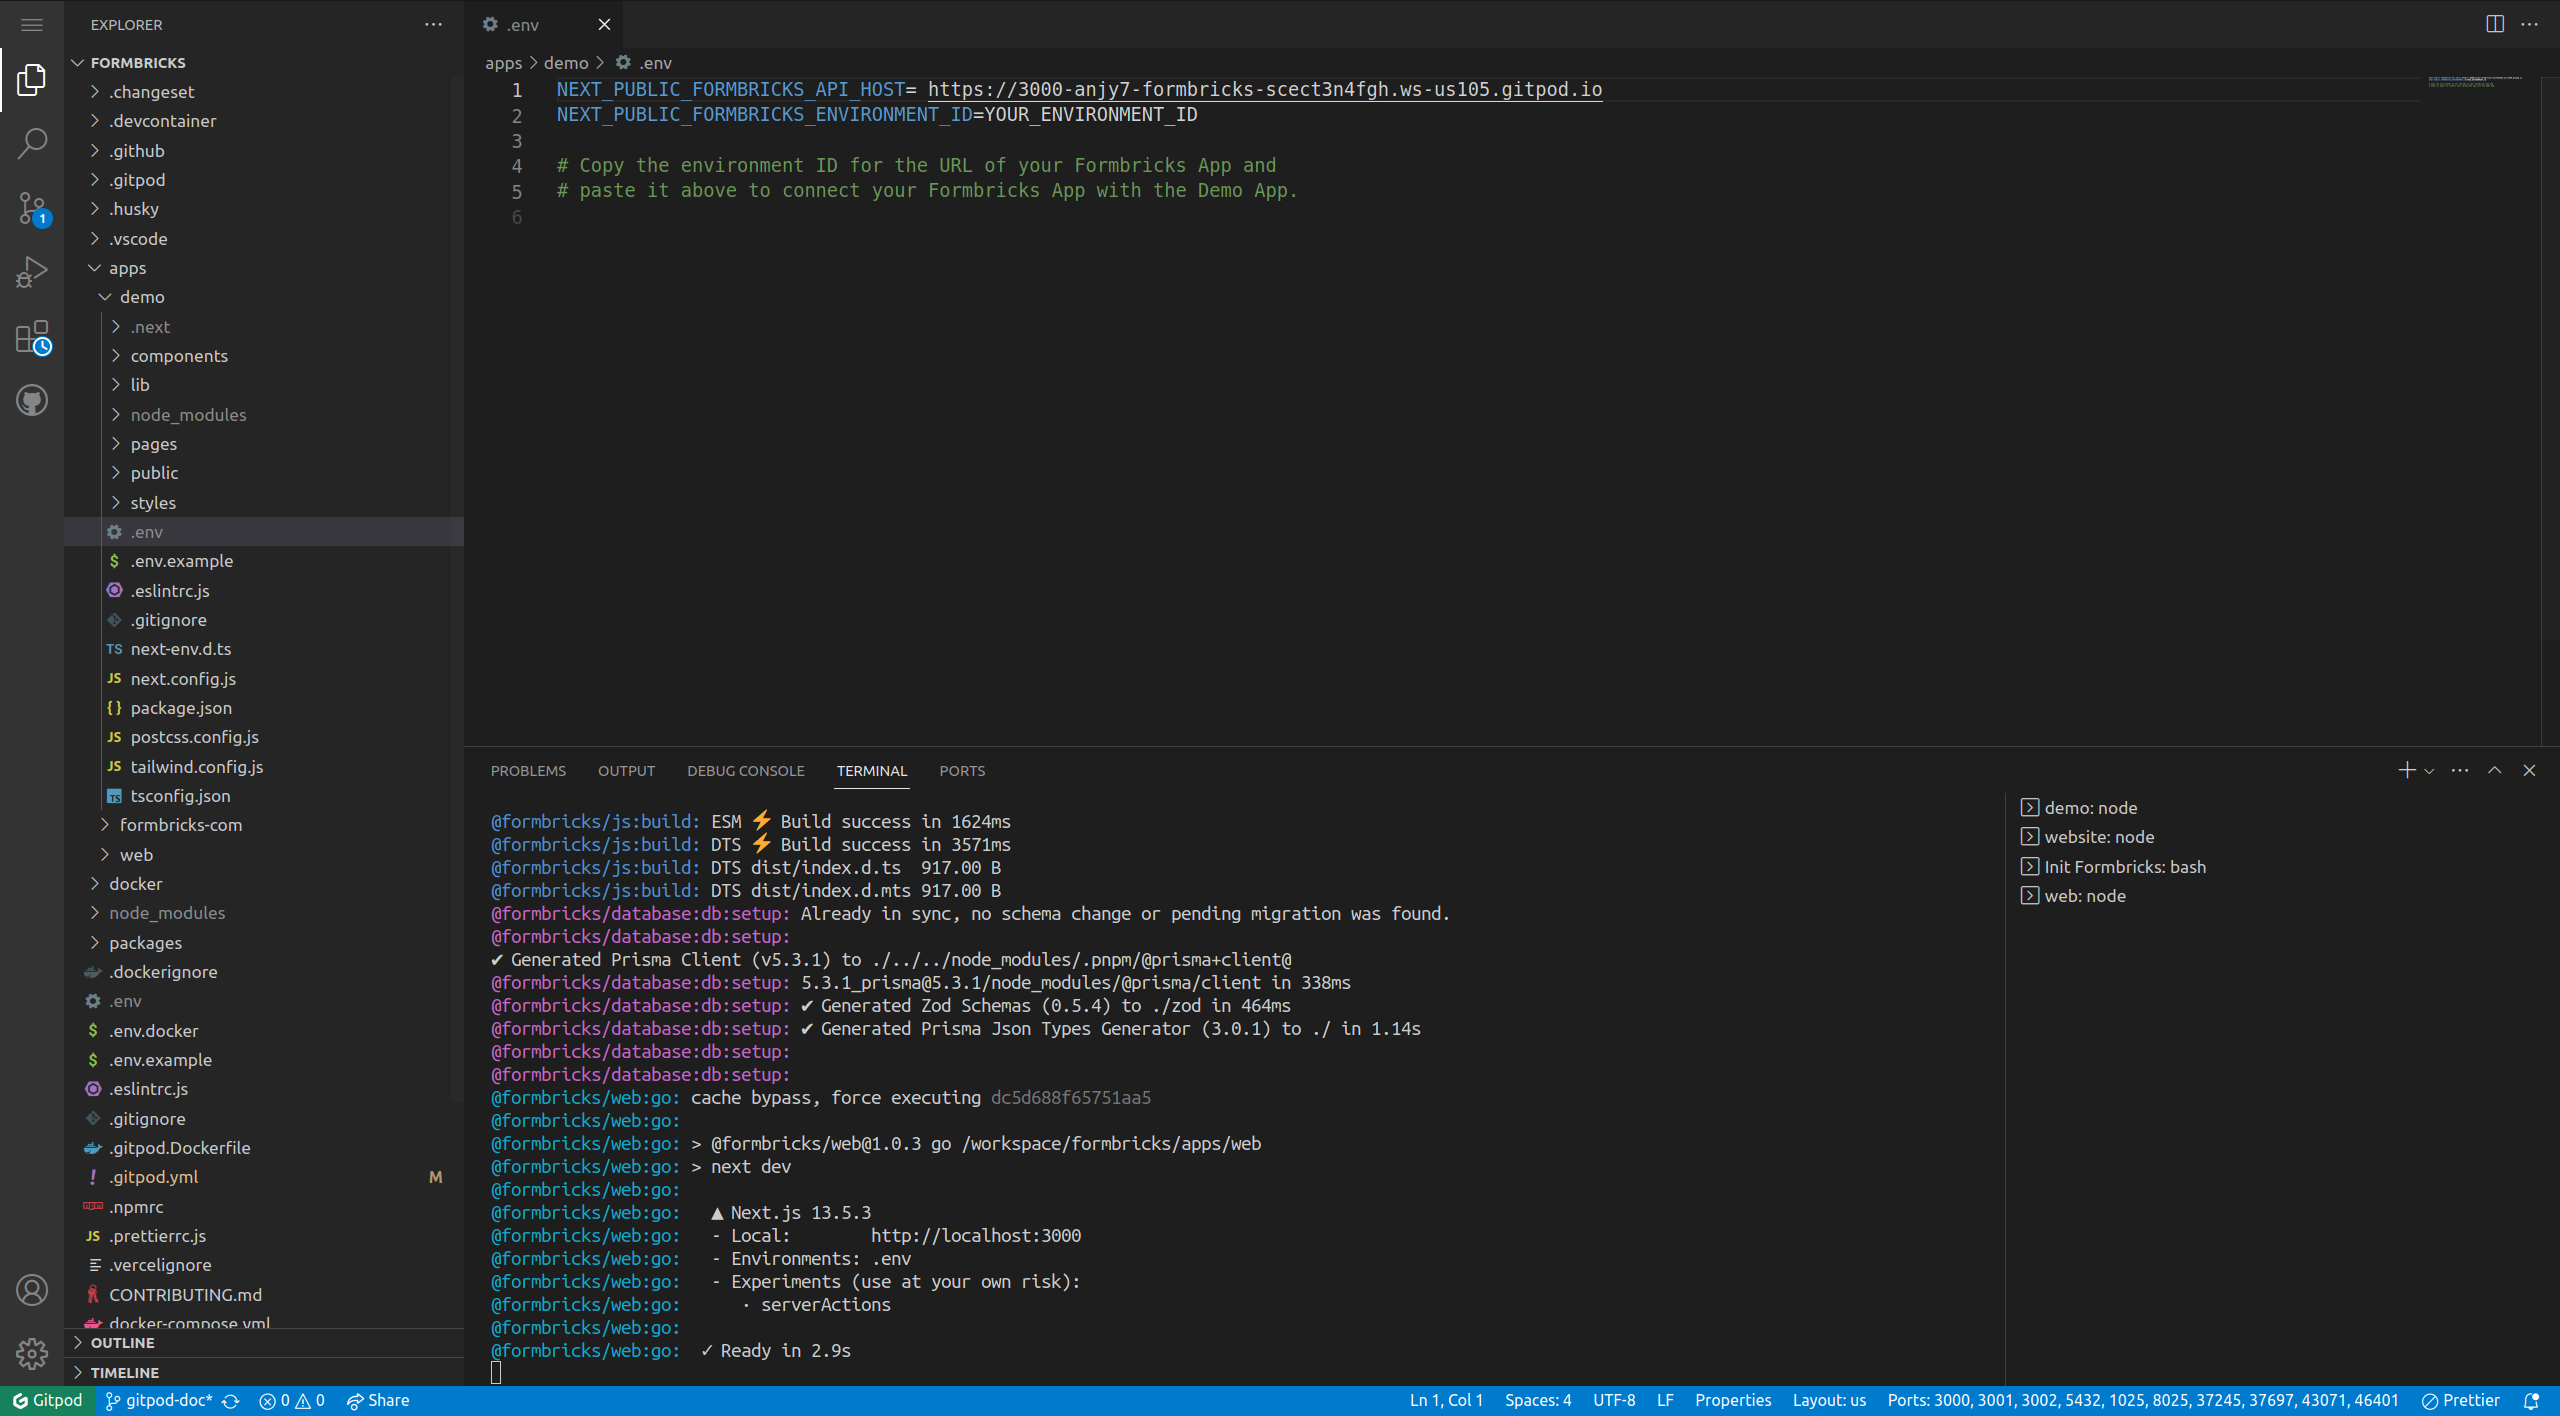
- Once the workspace is fully prepared, voila, it enters the running state. You can start working on your project in this environment.
Ports and Services
Here are the ports and corresponding URLs for the services within your Gitpod environment:
-
Port 3000:
- Service: Demo App
- Description: This port hosts the demo application of your project. You can access and interact with your application's demo by navigating to this port.
-
Port 3001:
- Service: Formbricks website
- Description: This port hosts the Formbricks website, which contains documents, pricing, blogs, best practices, and concierge service.
-
Port 3002:
- Service: Formbricks In-product Survey Demo App
- Description: This app helps you test your in-app surveys. You can create and test user actions, create and update user attributes, etc.
-
Port 5432:
- Service: PostgreSQL Database Server
- Description: The PostgreSQL DB is hosted on this port.
-
Port 1025:
- Service: SMPT server
- Description: SMTP Server for sending and receiving email messages. This server is responsible for handling email communication.
-
Port 8025:
- Service: Mailhog
Accessing port URLs
- Direct URL Composition:
- You can access the dedicated port URL by pre-pending the port number to the workspace URL.
- For example, if you want to access port 3000, you can use the URL format:
3000-yourworkspace.ws-eu45.gitpod.io.
- Using gp CLI:
- Gitpod provides a convenient command,
gp url, to quickly retrieve the URL for a specific port. - Simply use the command followed by the desired port number. For example, to get the URL for port 3000, run:
gp url 3000.
- Listing All Open Port URLs:
- If you prefer to see a list of all open port URLs at once, you can use the
gp ports listcommand. - Running this command will display a list of ports along with their corresponding URLs.
- Viewing All Ports in Panel:
- Gitpod also offers a user-friendly 'Ports' tab in the Gitpod panel.
- Click on the 'Ports' tab to view a list of all open ports and their respective URLs.

These URLs and port numbers represent various services and endpoints within your Gitpod environment. You can access and interact with these services by the Port URL for the respective service.
Github Codespaces Guide
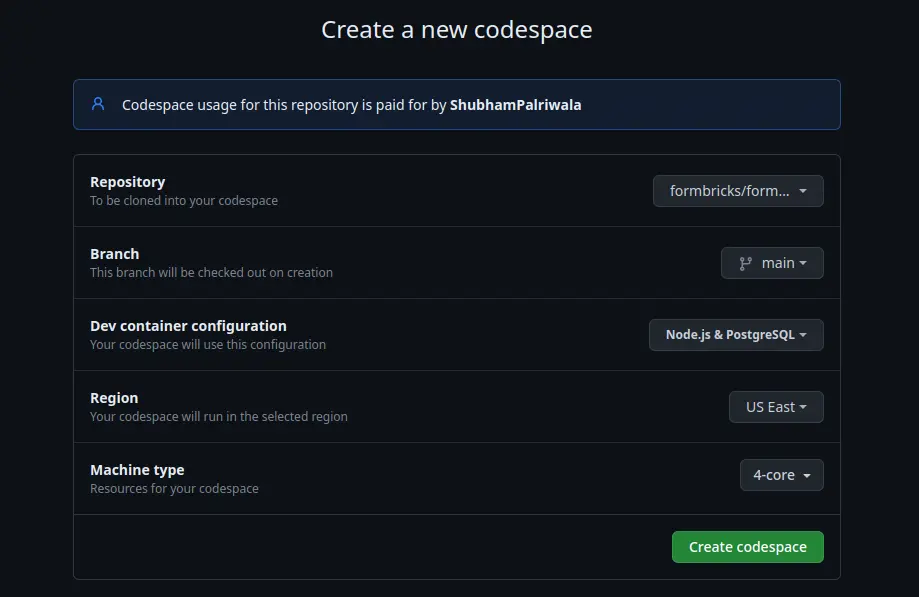
- After clicking the one-click setup button, you will be redirected to the Github Codespaces page. Review the configuration and click on the 'Create Codespace' button to create a new Codespace.
- This will start loading the Codespace. Keep in mind this might take a few minutes to complete depending on your internet connection and the instance availability.

-
Once the Codespace is loaded, you will be redirected to the VSCode editor. You can start working on your project in this environment.
-
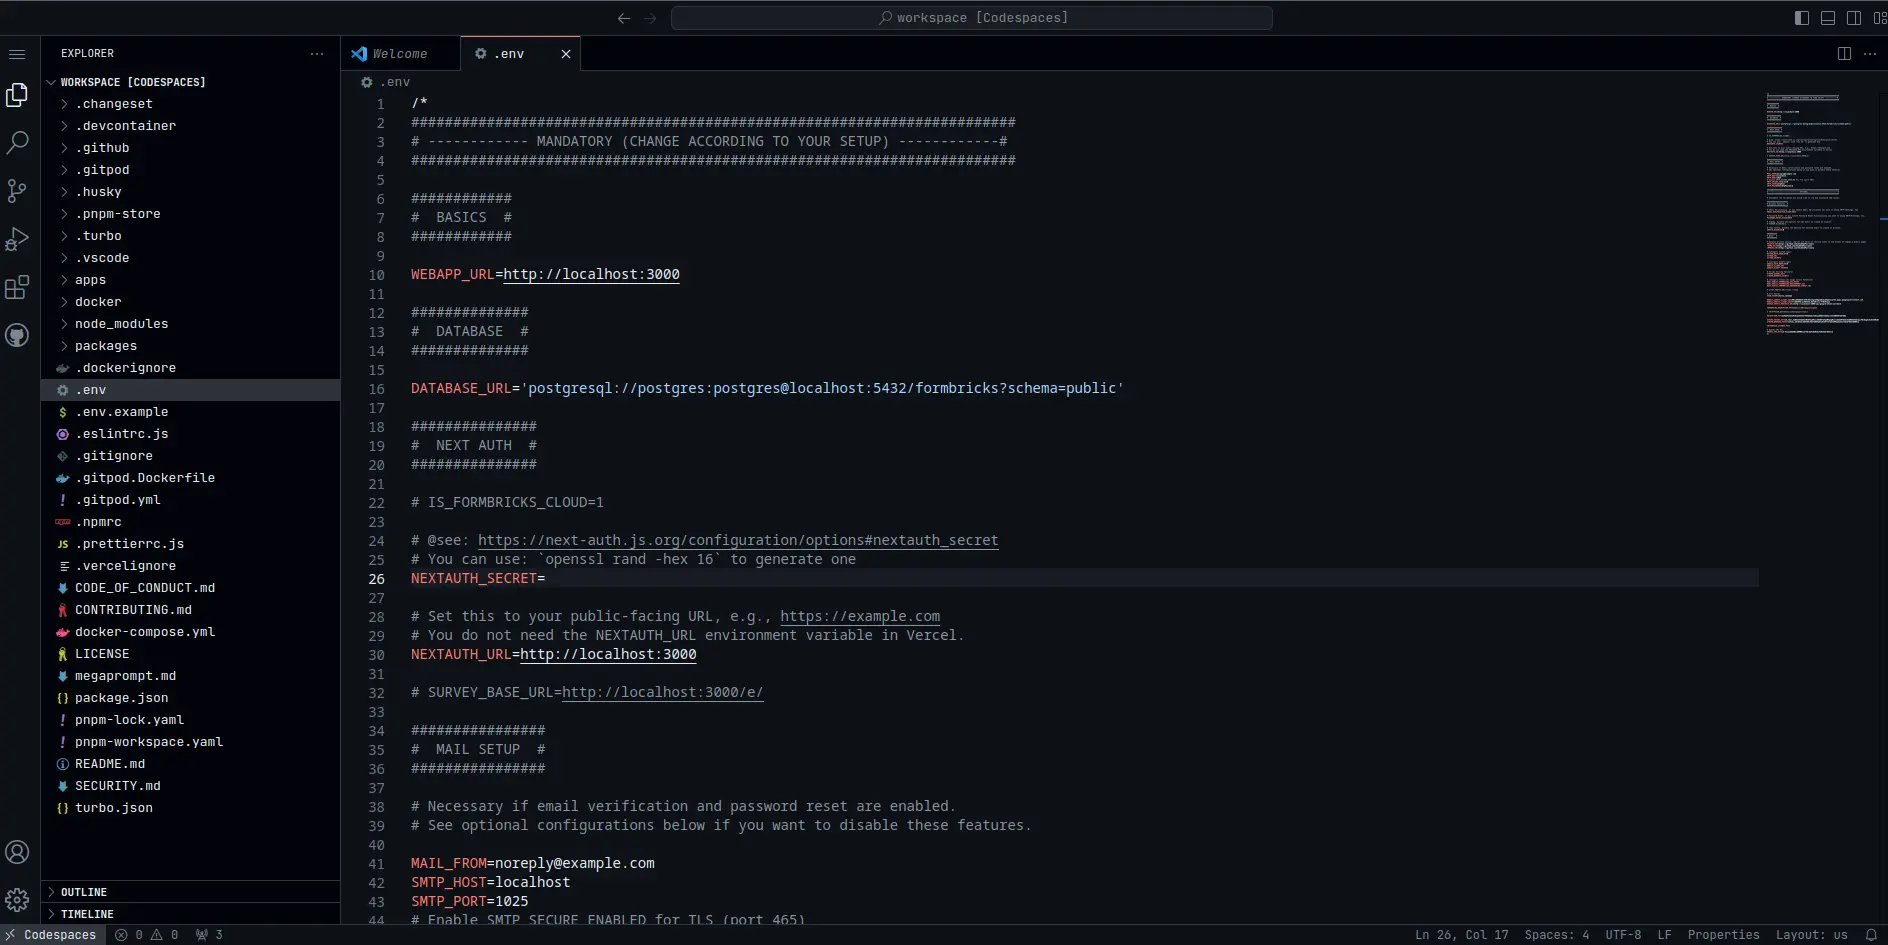
Make the changes you want to, and now, to run the app, we first need to configure the .env file. Copy the .env.example and edit the variables as mentioned in the file itself.
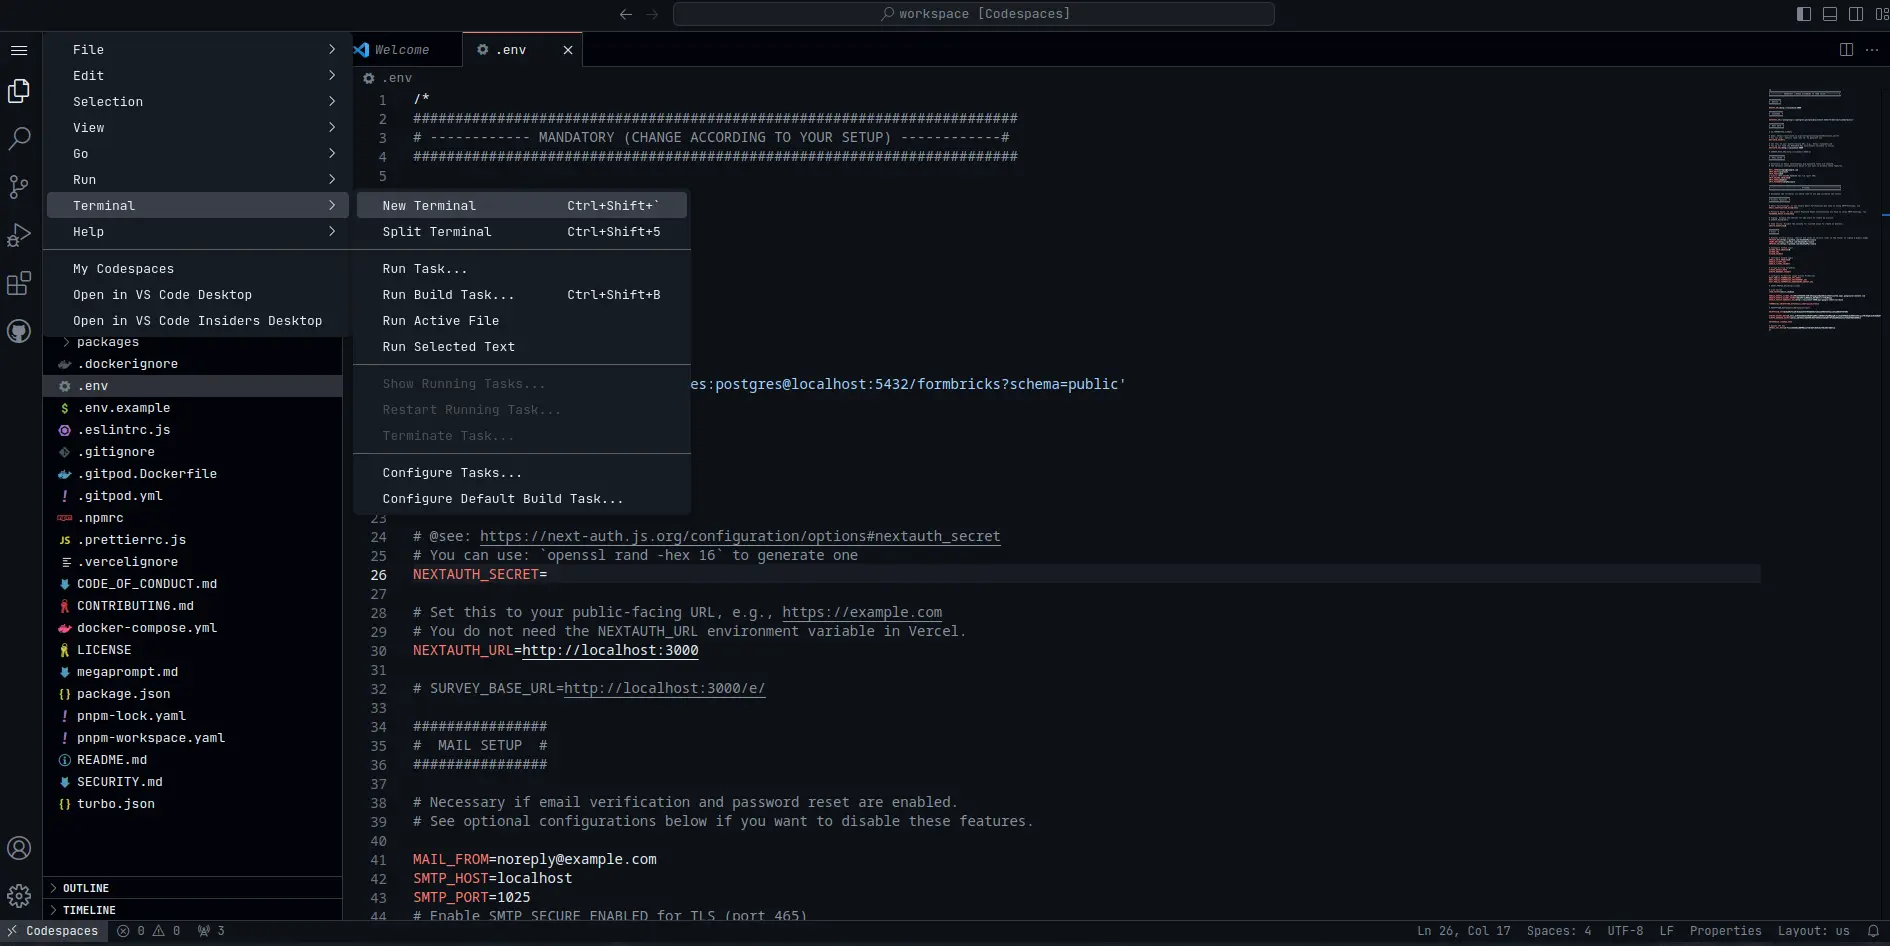
- Once you have configured the .env, it's now time to run the app and see the changes. Lets open the terminal first
- Now, run the following command to run the app
Run the entire Formbricks Stack
pnpm dev
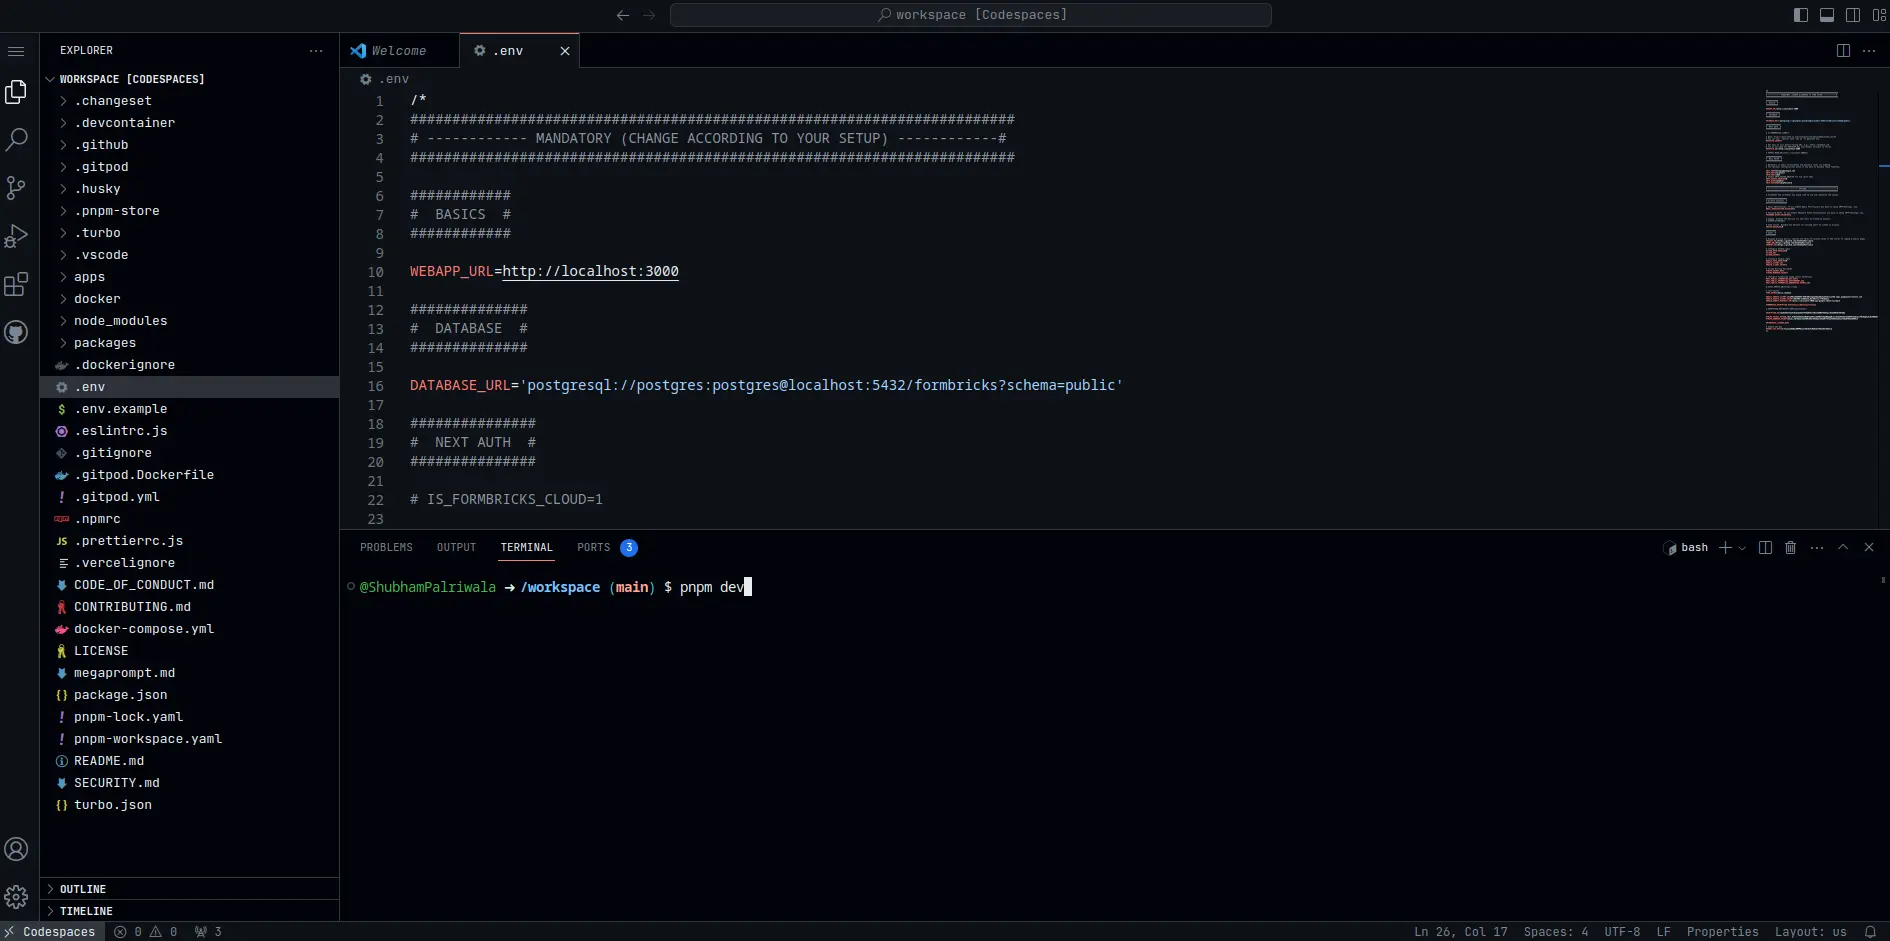
- Monitor the logs in the terminal and once you see the following, you are good to go!
The WebApp is running
@formbricks/web:dev:   ▲ Next.js 13.5.6
@formbricks/web:dev:   - Local:        http://localhost:3000
@formbricks/web:dev:   - Environments: .env
@formbricks/web:dev:   - Experiments (use at your own risk):
@formbricks/web:dev:      · serverActions
@formbricks/web:dev:
@formbricks/web:dev:  ✓ Ready in 9.4s
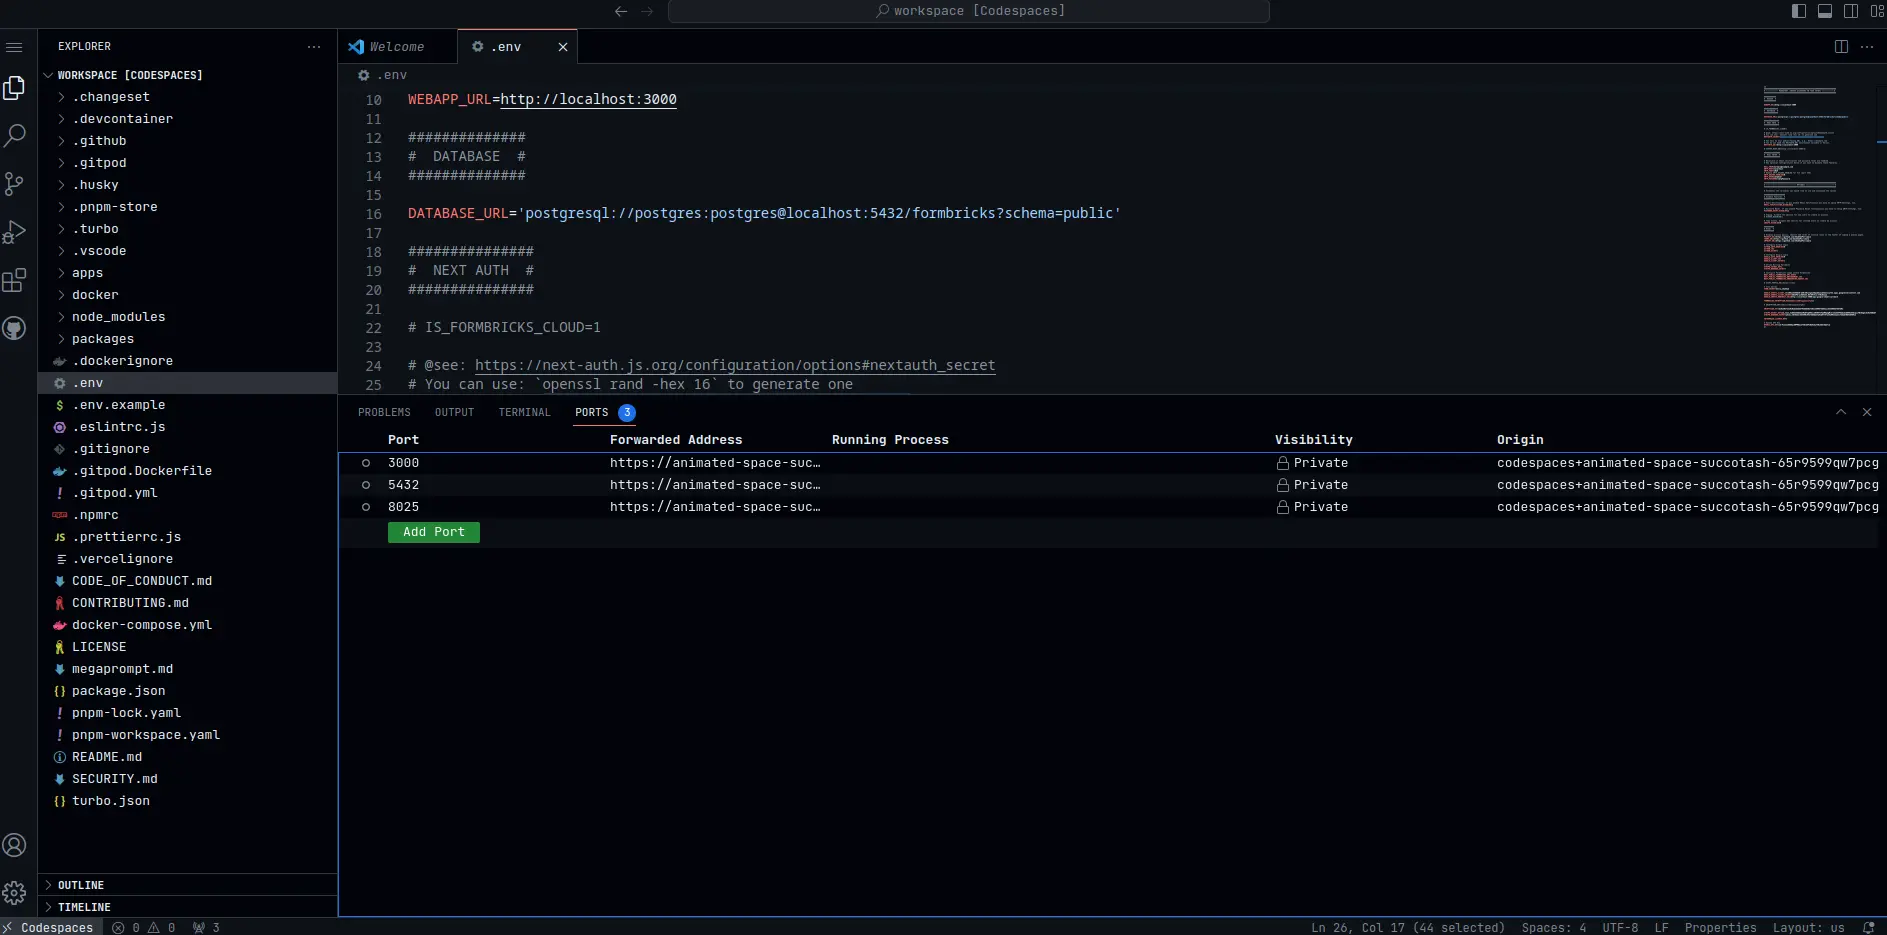
- Right next to the Terminal, you will see a Ports tab, click on it to see the ports and their respective URLs. Now access the Forwarded Address for port 3000 and you should be able to visit your Formbricks App!
Now make the changes you want to and see them live in action!
Local Machine Setup
The below only works for Mac, Linux & WSL2 on Windows (not on pure Windows)!
This method is recommended only for advanced users & we won't be able to provide official support for this.
To get the project running locally on your machine you need to have the following development tools installed:
- Clone the project & move into the directory:
Git clone Formbricks monorepo
git clone https://github.com/formbricks/formbricks && cd formbricks
- Install Node.JS packages via pnpm. Don't have pnpm? Get it here
Install dependencies via pnpm
pnpm install
- Create a
.envfile based on.env.example. It's already preset to work with the local development setup but you can also change values if needed.
Define environment variables
cp .env.example .env
- Generate & set some secret values mandatory for the ENCRYPTION_KEY & NEXTAUTH_SECRET in the .env file. You can use the following command to generate the random string of required length:
Set value of ENCRYPTION_KEY
sed -i '/^ENCRYPTION_KEY=/c\ENCRYPTION_KEY='$(openssl rand -hex 32) .env
sed -i '/^NEXTAUTH_SECRET=/c\NEXTAUTH_SECRET='$(openssl rand -hex 32) .env
- Make sure you have
Docker&docker-composeinstalled and running on your machine. Then run the following command to start the Formbricks dev setup:
Start Formbricks Dev Setup
pnpm go
This starts the Formbricks main app (plus all its dependencies) as well as the following services using Docker:
- a
postgrescontainer for hosting your database, - a
mailhogcontainer that acts as a mock SMTP server and shows received mails in a web UI (forwarded to your host'slocalhost:8025) - Demo App at http://localhost:3002
- Landing Page at http://localhost:3001
You can now access the Formbricks app on http://localhost:3000. You will be automatically redirected to the login. To use your local installation of formbricks, create a new account.
A fresh setup does not have a default account. Please create a new account and proceed accordingly.
For viewing the emails sent by the system, you can access mailhog at http://localhost:8025
Build
To build all apps and packages and check for build errors, run the following command:
Build Formbricks stack
pnpm build
Still can’t figure it out? Join our Discord!